27 August 2014

NUTELLA POUND CAKE

BY Unknown IN , , , , No comments

You know how you'd be sitting in the car waiting for the traffic light to turn green and your minds wanders and you think of random things or replay something that happened the day before? No?  Not Really?? I do that very often! Maybe it’s just me J . So this morning I was waiting for one such light to turn green and Kochu’s face came into mind. How he smiled at me when I offered him a whipped cream covered cake bowl to lick yesterday. He smiled, and was amazed I let him get all sticky and messy!

Remembering his and Chackochi’s expressions made me think, when I’m gone, what will Kochu remember the most about me? Yes, of all the things I could have thought about, this is what came into my mind. But seriously, when I’m dead and long gone, I hope Kochu will remember me for letting him lick the cake mixer bowl clean before he remembers me yelling at him for wrenching Chackochis arm when he wants Chackochi to come with him.

Kochu’s at that age where I am constantly yelling “No!” and “Stop!” on a regular basis. L He is always doing things he shouldn’t be doing and he knows that he shouldn’t be doing. This means I yell at Kochu… a lot. Certainly a lot more than I let him lick the cake bowl.  Oh dear… Hmmm how depressing!
Alright, so mental note, even if I don’t stop yelling so very often at Kochu, at least make sure I let him have fun just as much too. So that when I’m gone, he’ll remember me for the fun we had together  J

I know what you are thinking; I’m crazy but don’t you think about stuff like this too?? J

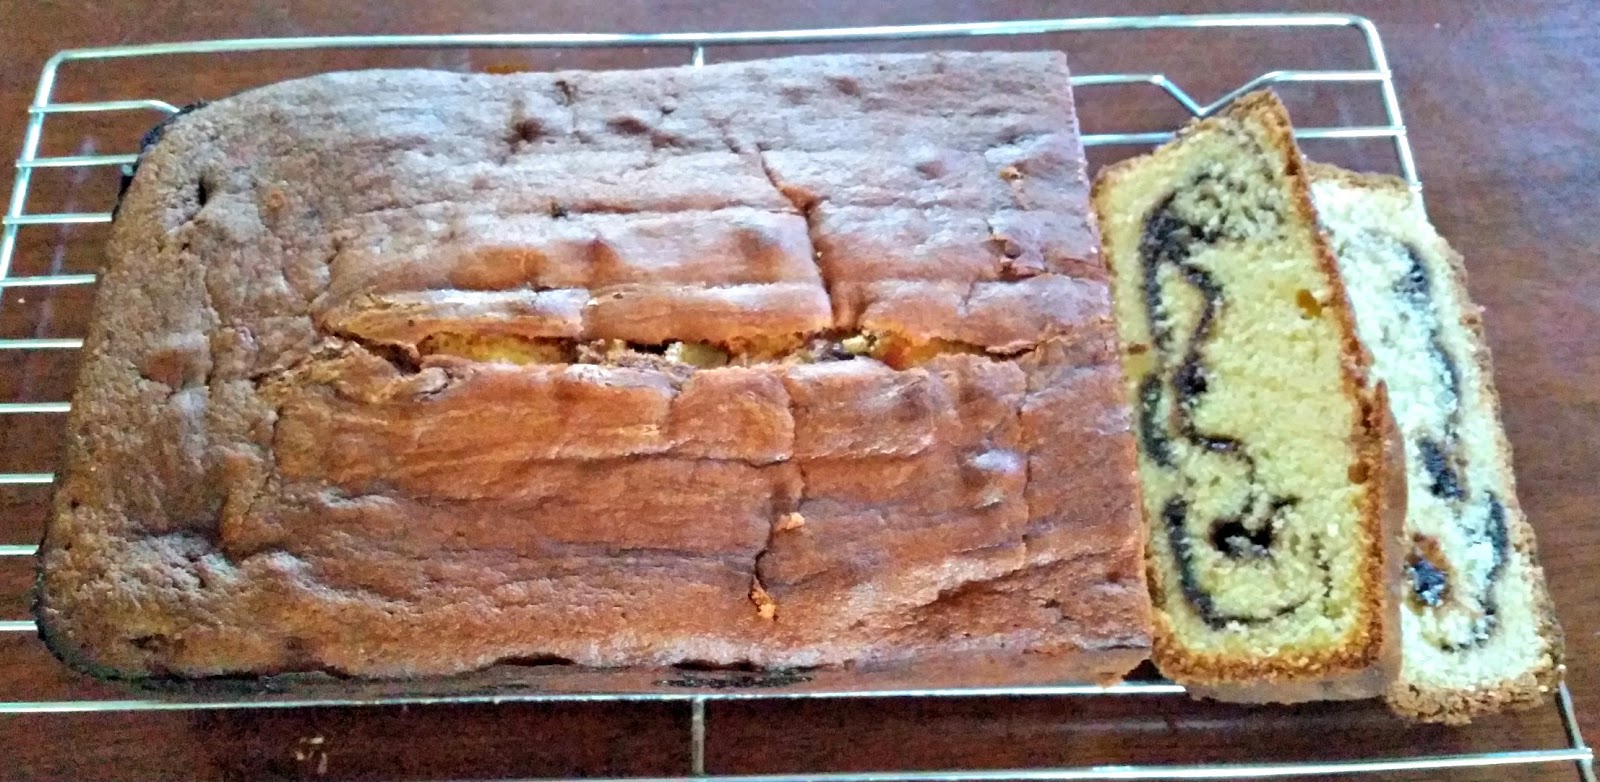
Right, crazy talk aside, today’s recipe is for the best ever Pound Cake I’ve ever had! The cake was literally gone in a couple of hours so it was a definite hit. Everyone asked for seconds and thirds. I haven’t made a cake that was this popular before.


And the of course addition of Nutella to it just takes it up a notch. You can omit the Nutella and make just the cake. I swear it will still taste just as heavenly. I made another variation of this as well a Butter Brownie Cake which was just as good. I’ll put up the recipe soon. But this is a definite must try recipe and I promise you’ll never look for another pound cake recipe again!

The original recipe actually layers the Nutella on quite thickly, but I didn’t put on as much and so my cake looked more like a marbled tea cake than a Nutella Layered Pound Cake. But the next time I make this (probably very soon!) I might actually layer the Nutella as thick as the original recipe does too. Oh my waistline is definitely not going to thank me for it, but all for the love of food, right?! J


NUTELLA POUND CAKE
Recipe Source:  RasaMalaysia
Makes one 9”x5” Loaf pan

INGREDIENTS:
1 1/2 cups all-purpose flour, plus more for dusting
4 large eggs, at room temperature
2 teaspoons pure vanilla extract
3/4 teaspoon baking powder
1/4 teaspoon salt
2 sticks (8 oz / 225 g / 1 cup) unsalted butter, softened
1 1/4 cups sugar (I used 1 cup)
One 13-ounce (350 g) jar Nutella

METHOD:
1.       Preheat the oven to 325°F (160°C). Lightly grease and flour a 9-by-5-inch loaf pan, tapping out any excess flour.
2.       In a glass measuring cup, lightly beat the eggs with the vanilla.
3.       In a medium bowl, whisk the 1 1/2 cups of flour with the baking powder and salt.
4.       In a large bowl, using a handheld mixer, beat the butter with the sugar at medium-high speed until fluffy, about 3 minutes.
5.       With the mixer at medium-low speed, gradually beat in the egg mixture until fully incorporated.
6.       Add the flour mixture in 3 batches, beating at low speed between additions until just incorporated. Continue to beat for 30 seconds longer.
7.       Spread one-third of the batter in the prepared pan, then spread half of the Nutella on top. Repeat with another third of the batter and the remaining Nutella. Top with the remaining batter. Lightly swirl the Nutella into the batter with a butter knife. Do not overmix.
8.       Bake the cake for about 1 hour and 15 minutes, until a toothpick inserted in the center comes out clean.
9.       Let the cake cool in the pan for 15 minutes. Invert the cake onto a wire rack, turn it right side up and let cool completely, about 2 hours. Cut the cake into slices and serve.


19 August 2014

Milk and Cookies Cupcakes

BY Unknown IN , , No comments

The final lap to Kochu's birthday celebrations was making some cupcakes to take into daycare for Kochu to share with his friends. I tossed and turned about making him another cake but this was just a day after the whole Spider-man cake saga and to tell you the truth, I was all caked out! I couldn't bring my self to bake and decorate another whole cake and so in the end I decided to go with cupcakes. 
You just can't go wrong with cupcakes. Kids love them! 
Milk and cookies are one of those things that makes everything better. It’s also a perfect snack. But this time, milk and cookies came in cupcakes version. These Milk and cookies cupcakes have very good texture , dotted with mini chocolate chips.
The frosting is very milky and creamy and isn’t too sweet. This combo of this frosting and chocolate chips cupcakes, really does taste like milk and cookies.  Decorated with mini  chocolate chip cookies and extra chocolate chips, these are really great treat.  I made the mini cookies as well from scratch, but they’re really just for garnish and you can skip them if you like. Except that they’re delicious, so please make them.

Have a go and tell me you and your kids didn't love it! :)


Milk & Cookies Cupcakes
Slightly adapted from Lemon Sugar and Raspberri Cupcakes
Yield:  24 cupcakes

Vanilla Cupcake 
Ingredients:
  • 2 cups sugar
  • 4 eggs
  • 2 and 1/2 cups all-purpose flour
  • 1 cup milk
  • 3/4 cup vegetable oil
  • 2 and 1/4 teaspoons baking powder
  • 1 teaspoon vanilla 
  • 6 oz mini chocolate chips, plus more for garnish
  • 2 Tablespoons all-purpose flour (to coat chips)
Method:
Preheat oven to 325 degrees F. Beat together eggs and sugar until slightly thickened, about 1 minute. Add flour, milk, oil, baking powder and vanilla and beat for another minute. Pour  mini chocolate chips into a small bowl.  Sprinkle 2 Tablespoons of flour over chips, and mix to coat.  Fold coated chips into batter.Pour batter into lined cupcake tins, filling each tin 2/3 full. Bake for 18-20 minutes (or use a cake-tester).  Remove from cupcake tin right away, and allow to cool on a wire rack.


Mini Chocolate Chip Cookies
Yield:  36-48 mini cookies

Ingredients:
  • 1/2 cup unsalted butter, softened
  • 1/4 cup granulated (white) sugar
  • 1/2 cup packed brown sugar
  • 1 and 1/4 cup all-purpose flour
  • 1/2 teaspoon baking soda
  • 1/2 teaspoon salt
  • 1 teaspoon vanilla
  • 1 large egg, room temperature
  • 6 oz mini chocolate chips
Method:
Preheat oven to 375 degrees.  Line a large baking sheet with a silpat mat or parchment paper, and set aside.

Beat together butter and both sugars until creamy and fluffy.  Meanwhile, combine flour, salt and baking soda in a small bowl.  Add egg and vanilla to butter mixture, and beat until just combined.  Slowly add the flour mixture and beat until just combined.  Fold in chocolate chips.

Spoon a very small spoonful (about the size of a large marble) on to the cookie sheet.  Bake for 4-5 minutes or until the edges are just beginning to turn brown.  Remove from oven and allow to sit on the cookie sheet for another 1-2 minutes.  Transfer cookies to a wire rack, and repeat.

If your kitchen is warm, it would be a good idea to keep the batter in the fridge between batches.  Otherwise, they will spread too much.

Allow cookies to cool completely before garnishing.


Milk Frosting 
Ingredients:
  • 3 sticks (1 and 1/2 cups) unsalted butter, cool room temperature
  • 3 and 1/2 cups confectioners/powdered sugar
  • 7 oz sweetened condensed milk
  • 2 Tablespoons heavy cream
  • 1 teaspoon vanilla extract
  • Amerigel Brown color (optional)
Method:
In the bowl of a stand mixer using the paddle attachment, beat the butter until smooth and creamy.  Add the powdered sugar, and beat to combine.  Add condensed milk, cream and vanilla extract, then beat until light and fluffy, about 5 minutes.

If you want to get the double color toned frosting like mine:
Divide the frosting into two bowls. Add a couple of drops of the brown gel color to one bowl. Mix well to incorporate the color. Keep the other half of the frosting white.
Fill a piping bag with both colors, brown on one side and white on the other.Firmly squeeze the bag until you’re getting equal parts of each icing from the tip.

Generously frost cooled cupcakes.


14 August 2014

Spider-man Birthday Cake - Black & White Cake with Creamy Vanilla Buttercream Frosting

BY Unknown IN , , , , , , No comments

If your birthday honoree can't decide whether he or she wants vanilla or chocolate, this cake is the perfect choice because it delivers both. For Kochu there really wasn't much confusion, chocolate would win hands down every time, but I wanted to do something different. I was bored of making plain chocolate cakes.

I knew I wanted a layered cake and in different flavors, but just wasn't decided on the flavors of the layers yet. I initially thought I'd go with a chocolate cake layer and a butter cake layer. But then I was worried that my butter cake layer would be too soft/moist to stand up for a layered cake. So I scrapped that idea. That was when I came across this beautiful black and white cake at Lemon Sugar. This is an awesome blog with so many beautiful cake and cupcake recipes that are to die for! I've already bookmarked quite a few of her recipes to try later. The frosting though I had to adapt a bit to my liking and measurements but it is pretty much still the same recipe.

Even though the WASC cake start with a plain vanilla cake mix it, ends up with a luscious yellow cake that is just so moist and yummy. And the chocolate cake, need I say more? It is chocolate after all!  And then came the frosting. Smooth, buttery, need I say more?? J

Put it all together, and what do you get? A wonderful combination of flavors and once again, another recipe that produces an elegant dessert that is fit for the fanciest of dinner parties. The cakes were light and fluffy, the fillings smooth and rich, all the flavors blending together into a harmonious whole. I was quite pleased with the cake: it is surprisingly light in texture but satisfyingly substantial - you can taste the richness of the chocolate, the delicate crumb of the cake, the weightless give of the fr
osting beneath your bite. This is really a cake where using good ingredients will make it shine.

Here's a couple of pictures of the cake. Again, not so great pictures, but you'll get the idea! 


I hope you’ll give this one a try.  If you're looking for a striking cake for a special occasion look no further, this is a must try recipe! J

Chocolate Cake
Recipe Source: Lemon Sugar 
Yield:  Two 9-inch layers

Ingredients:
  • 2 cups sugar
  • 1 and 3/4 cups all-purpose flour
  • 1 and 1/2 teaspoons baking powder
  • 1 teaspoon salt
  • 1 cup milk
  • 2 teaspoons vanilla extract
  • 3/4 cup cocoa powder
  • 1 and 1/2 teaspoons baking soda
  • 2 eggs
  • 1/2 cup vegetable oil
  • 1 cup boiling water
Preheat oven to 350 degrees (F).  Prepare two round, 9-inch baking pans by coating them with cooking spray and a parchment round.   (Cut a 9 inch round circle of parchment, place in bottom of pan sprayed with cooking spray.)
In a large bowl, whisk together sugar, flour, cocoa powder, baking powder, baking soda and salt.  Add eggs, milk, oil and vanilla and beat on medium speed for two minutes.  Slowly stir in boiling water, and note that the batter will be very thin.  Pour evenly into prepared pans.
Bake for 30 to 35 minutes or until a cake tester comes out clean.  Cool in pans for 10 minutes, then remove from pans and cool on wire rack until completely cool.

White Almond Sour Cream Cake
Recipe Source: Lemon Sugar 
Yield:  Two 9-inch layers

Ingredients:
  • 1 box white cake mix (see notes)
  • 1 cup all-purpose flour
  • 1 cup white/granulated sugar
  • 3/4 teaspoon salt
  • 4 egg whites
  • 1 and 1/3 cups water
  • 2 Tablespoons vegetable oil
  • 1 cup (8oz) sour cream
  • 1 teaspoons vanilla extract
  • 1 teaspoons almond extract
Preheat oven to 325 degrees (F).  Prepare two round, 9-inch baking pans by coating them with cooking spray and a parchment round.   (Cut a 9 inch round circle of parchment, place in bottom of pan sprayed with cooking spray.)
In a large mixing bowl, combine all ingredients.  With a hand mixer, beat ingredients for about two minutes or until batter becomes smooth and silky.  Pour evenly into prepared pans and bake for 30-37 minutes, or until a cake tester comes out clean. (Mine usually takes 34 minutes.)
Cool in pans for 10 minutes, then remove from pans and cool on wire rack until completely cool.


Creamy Vanilla Buttercream Frosting
Adapted from: Lemon Sugar 
Ingredients:
  • 1 cup unsalted butter at cool room temperature
  • 6 cups icing sugar 
  • 1/2 cup whipping cream
  • 2 Tablespoons vanilla extract
  • pinch of salt
  • 1 tablespoon of water
In an electric mixer fitted with the paddle attachment, beat the butter and icing sugar on low speed until just combined. Increase speed to medium and beat until well-incorporated, about 3 minutes.
Add the vanilla, water, whipping cream and salt, and whip on med-high speed until fluffy and smooth--about 3 more minutes. If consistency is too thick, add more water 1 teaspoon at a time, then whip again for 30 seconds or so. If your frosting is too thin, you can add more icing sugar a few tablespoons at a time until you achieve desired consistency.

Assembling the cake
Trim any doming or top crust from cake layers using a very sharp serrated knife.
Place a small dollop of frosting in the center of a cake plate or 10″ round thin foil-covered cake board, and place the bottom cake layer on top, face-up.
Place ~1 cup of frosting on top of the cake layer, and spread evenly with a small offset palette knife. Gently place 2nd cake layer, face up, on top. Repeat until you come to your 4th layer, which you will place face down.
Put a generous scoop of frosting on top, spreading evenly with a small offset palette knife and working your way down the sides until you have a thin layer of frosting over the entire cake. Chill until set, about 30 minutes.
Remove from refrigerator and apply another "coat" of frosting.
Decorate cake as desired.  This is enough frosting to fill three layers and frost the remainder of the cake.  I do recommend a crumb-coat before your final coat of frosting.

Notes:
  • I used AmeriGel colors to color the icing - Red Red and Royal Blue
  • For the box cake mix I used Betty CrockerVanilla Cake Mix
  • Store, covered in a cake dome, at room temperature for up to  3 days, or in refrigerator for up to 5 days. Best enjoyed day 1 or 2 at room temperature.


12 August 2014

Spider-man Birthday Cake for Issac's 3rd Birthday

BY Unknown IN , , 4 comments

Our Kochu Varkey (Isaac) is 3 today! It feels like only yesterday I had written a post about him getting his first tooth! Time is just flying by. He has grown from an absolutely adorable baby to a smart and very talkative boy that he is today.  Every now and then he says something that totally amazes me and I realise my baby is growing up! My big boy, mwah!


Ever since we had Chackochis birthday party, Kochu kept constantly reminding me that he wanted a Spiderman cake for his birthday.  Gulp! Spiderman?  Really?? Why couldn’t he have just asked for a chocolate cake covered with M&M’s or a banana cake with chocolate icing or something simpler?

Isaac’s birthday is really today, 12th of August, but it being a working day, we had a small cake cutting celebration with Family in the weekend. A themed cake just seemed too daunting to me. I was, more than once, tempted to just order a cake from the professionals! But then again, I wanted to make it for him, to see his face light up when he saw the cake first thing in the morning. Just seeing his joy and surprise would make up for all the pain and effort needed to make that cake with 2 hyper-active kids and a husband with a fractured ankle! And besides this is the first birthday when he actually understands that it is a special day and it’s all about him! So I certainly did not want to let him down!

Like you all know I’m an absolute novice at baking. I’ve only started making cakes and the first thing he asks me is for a Spiderman cake?? I’ve been stressing over this for weeks!  I spent hours on Pinterest looking at different cake designs. I didn't want to make anything too difficult... I know my limitations! I really liked the Spiderman face design but I really suck at drawing and was sure I wouldn’t be able to get the shape of his head right. Actually, I wasn’t even sure what I wanted do until a couple of days before I started making the cake!

For the cake I decided to go with a layered cake of Hershey’s Perfectly Chocolate Cake and the White Almond Sour Cream Cake with Vanilla buttercream icing. The light, creamy buttercream holds it all together without being too sweet or sugary.  I thought even if the cake didn’t look good, at least it should taste good!
The recipes made two 9 inch layers, but I prepared two 9″ round cakes, and two 8″ round cakes of both flavours, so I could get the tiered cake.

Once I had the cakes baked and cooled, Renju used a serrated knife to level them off. I whipped up the buttercream and then divided them into two bowls and added the red and blue colours to each to get Spidey’s colors.

I made some homemade marshmallow fondant earlier in the week to make the spider and also for the “Happy Birthday” letters and the stars. It was the very first time I worked with fondant, and let me tell you it is not a simple thing to work with! Oh the time I spent kneading that thing to get the colours I wanted!!!
I wanted 2 colours that I would have to dye the fondant.  Dividing the fondant into 2 portions, I took one of the portions and placed it in the microwave for 10 seconds.  Sometimes the fondant can be a little hard to work with when you take it straight from the fridge.  Make sure to ONLY microwave it for 10 seconds.  Any longer, and the fondant will be way too soft, believe me, I learned the hard way! And a note to the wise, next time I’d definitely use chocolate colored fondant and then dye black. White fondant just took forever to become black!

Kochu declared it was the tastiest birthday cake I have ever baked. He was very happy with how it looked and tasted as he kept coming for more! J

All in all I was delighted with it. And for someone who's been baking for less than a couple of months it's a pretty good achievement! Kochu loved it which is the most important thing. 

Please be warned, this is just my very humble effort at a Spiderman themed cake.  Sorry I didn’t take any photos during the making process because I was really stressed!


Recipes for the cakes and buttercream icing to follow soon! J

11 August 2014

Cheesy Carrot Bites

BY Unknown IN , , , , , , No comments

Feeding a growing boy gets really interesting once he decides to be independent and feed himself.  The teachers at day-care warned me that this was starting to happen and that Chackochi wouldn't let them feed him anymore. So that meant only one thing- prepare myself for finding dried up bits of food in random places all over the house! Yuck!

One of the ways to avoid a little of the mess and to allow him to still explore the fun of self-feeding is of course finger foods.  So he gets to have some independence and I get to still give him something tasty and nutritious.

This Cheesy Carrot Bites recipe is just another take on my Sweet Corn Mini Fritters. The recipe is quite versatile and you can make numerous variations of these! I made note of some options in the Notes section after the recipe, just to give you an idea. If you come up with a new flavor combo that your baby loves, let me know!

They're delicious, honestly. And, plus, how easy is the recipe! My favorite way for a recipe to begin is ‘Preheat the oven…’ because it shows that the prep doesn't need too much fiddling around with. The next best thing to see is ‘Combine all ingredients’ – can’t get any easier than that. J

And you can also prepare these in advance and freeze them for up to a month. How cool is that! In my opinion, these are best straight from the oven.  When I reheated them in the microwave, they were a bit soggy, but still tasty! (Yes, I had a couple too; they looked  way too tasty to resist  ;))


Cheesy Carrot Bites
Recipe Source:  Recipris 
Makes 15-20 medium-sized balls

Ingredients:
½ cup grated cheese (I used a mixture of Parmesan, Cheddar and Mozzarella)
¾ cup breadcrumbs
½ cup grated carrots
2 eggs, whisked
Olive oil spray (as needed)
Salt and Pepper to taste

Method:
1.       Preheat the oven to 190°C.
2.       Combine all ingredients apart from the oil, and mix well.
3.       Take a tablespoon-sized portion of the mixture and squeeze it gently into a ball.
4.       Lay on a lightly greased baking sheet, and repeat with the remaining mixture.


5.       Spray the tops of the balls lightly with spray oil, bake until lightly golden, about 15-20 minutes. ( I got distracted and I left them in for about 30 minutes, so they ended up a bit more brown than I would have liked)
6.       Serve immediately.


Notes:
Option 1 - Substitute 2 cups of shredded zucchini for the carrot. Add 1/2 cup ricotta and increase dry ingredients by 1/4 cup. Remember to squeeze out the moisture from the zucchini or it will be soggy.

Option 2 - Substitute 1 cup shredded sweet potato and 1 cup shredded pear (use a firm pear like Bosc) for the carrot

Option 3 – Add 1 Cup of shredded apple to the above recipe