19 September 2014

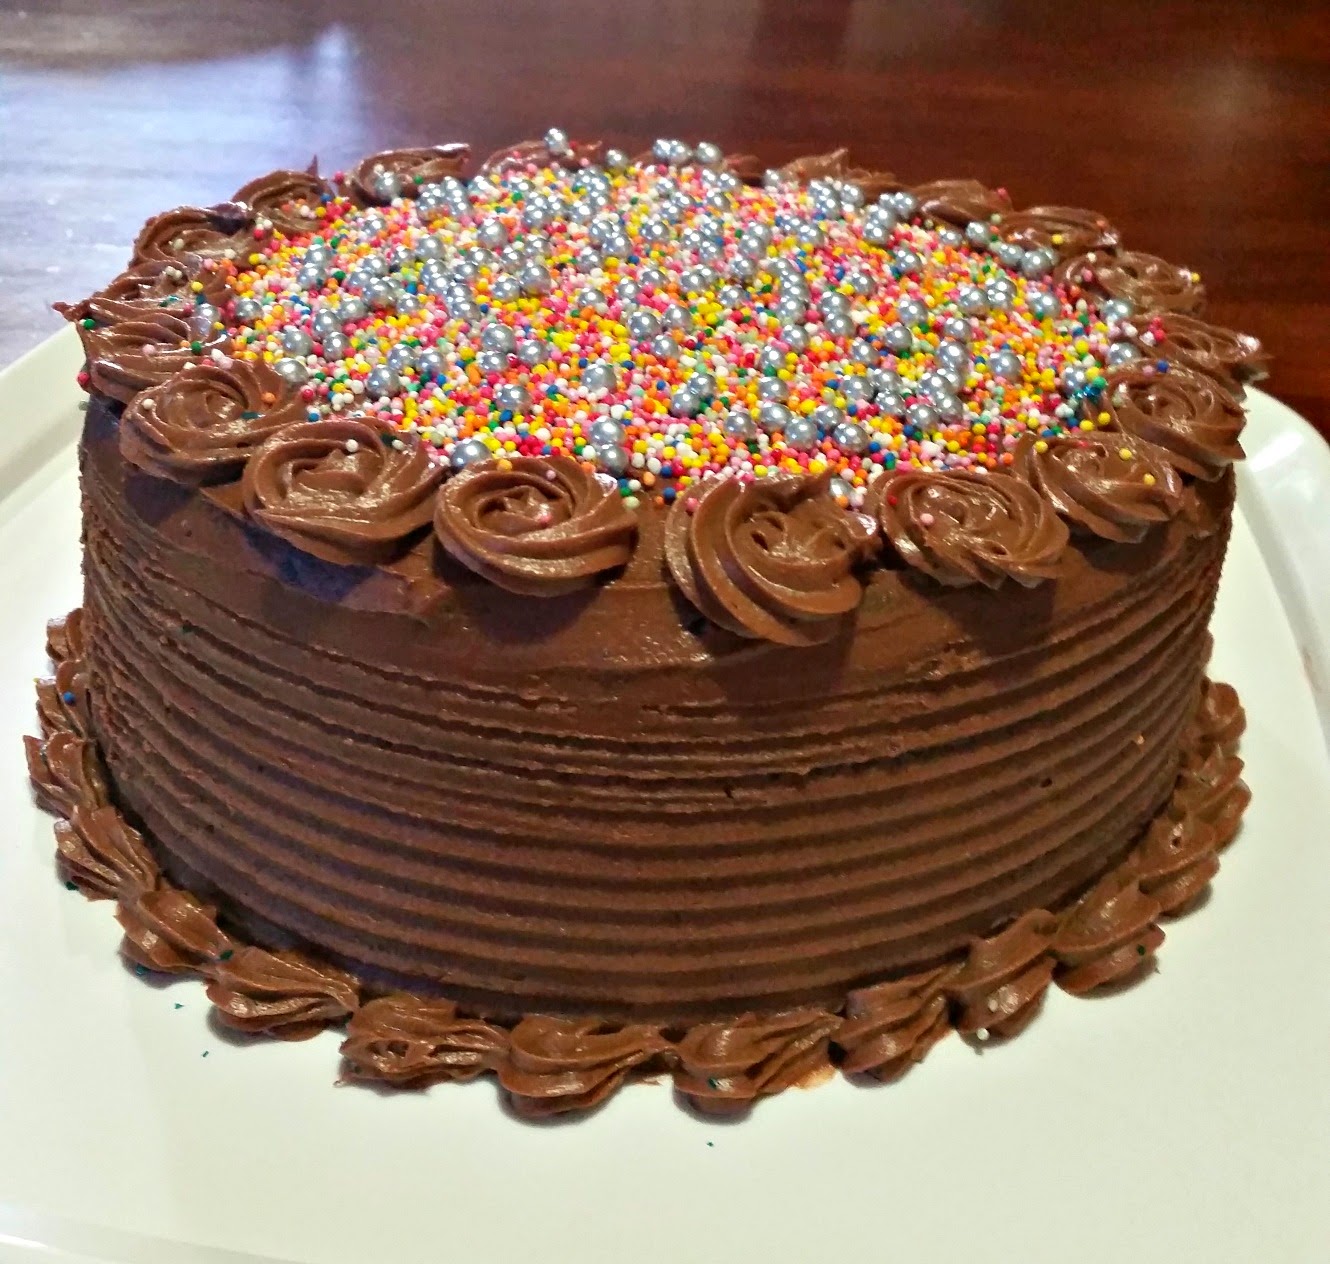
Chocolate Brownie Cake with Cookie Dough Filling

BY Unknown IN , , , , No comments

I made this cake for a family friend’s birthday, Uncle V J. It was meant to be a surprise as he didn't know we were doing this for him. It was fun conspiring with his kids and sneaking into the house to decorate it while Aunty lured him away from the house saying she needed to get some fresh air! 


I’m not sure why I chose this cake. I wanted to try something different and I've never had a brownie cake with cookie dough filling before. And now that I've tried it, I’m not entirely sure I’d make it again. No fault of the cake though. The cake was perfect just as the recipe said it would be. The cake layers were typical brownies – chewy, chocolaty and moist. Not sure what else I’d expected from a brownie cake. Duh!

It was Yum, don’t get me wrong, but I think it was just personal preference. Everyone else thought the cake was nice (or they were being really polite!!! JJJ) but I think I prefer my cakes to be light, moist and definitely not chewy. So as you’d have guessed by now, I’m not a huge fan of brownies or fudge.

Then why the heck did I make this cake, you ask? Beats me!!!!! This just looked so decadent in the photos at Lemon Sugar, I just couldn't resist.

The cake is rich, dense and prefect for the chocolate lover. It might be even more awesome with some whipped cream or even some French vanilla ice cream. As far as layer cakes go, this has to be the easiest cake to make. Just bake the brownie layers, make the filling and pour over the ganache. Tada!!!! JJ

Don’t let me put you off this cake, it is really decadent and yummy, just not my absolute favorite cake. You should have a go and tell me what you think. You never know I could be totally wrong and this could be “The” cake from Heaven for you! JJ

I followed Lemon Sugar’s recipe for the cake and filling but slightly adapted the ganache recipe as I didn't have any corn syrup on hand and couldn't be bothered going to the supermarket at 11pm at night. I think that might be why my ganache didn't turn out as glossy as hers. You can check out the original recipe here.


Chocolate Brownie Cake with Cookie Dough Filling
Recipe Source: Lemon Sugar

Ingredients
Brownie Cake:
1 and 1/2 cups vegetable oil
3 cups sugar
3 teaspoons vanilla extract
6 eggs
1 and 1/2 cups flour
1 cup cocoa powder
3/4 teaspoon baking powder
1/4 teaspoon salt

Cookie Dough Filling:
3 sticks unsalted butter, at room temperature
3/4 cup light brown sugar, packed
3 and 1/2 cups confectioners’ sugar
1 cup all-purpose flour
3/4 teaspoon salt
3 Tablespoons milk
2 and 1/2 teaspoons vanilla extract

Ganache Frosting:
1/4 cup + 2tblsp heavy whipping cream
2 teaspoons vanilla extract
3/4 cup Chocolate chips
Extra chocolate chips, for garnish

Method:
Brownies:
  1. Pre-heat oven to 350 degrees (F).
  2. Prepare three 8-inch round baking pans with cooking spray and parchment.
  3. In a large bowl, combine sugar and oil. Stir with a large wooden spoon until completely combined.
  4. Add eggs one at a time, stirring and incorporating each completely before adding another.
  5. Add vanilla, stir to combine.
  6. In a medium bowl, combine dry ingredients (flour, cocoa powder, salt and baking powder.) Whisk to combine.
  7. Add dry ingredients a little bit at a time, stirring until just absorbed each time. I added mine in 3 batches. Do not over-mix, just stir until dry ingredients are fully incorporated.
  8. Pour batter evenly into three prepared pans.
  9. Bake for 20-25 minutes, or until a toothpick comes out with wet crumbs.
  10. Cool completely, then remove from pans and set aside.
  11. Prepare filling.
Cookie Dough Filling:
  1. In a large bowl (I used my stand mixer) beat butter and brown sugar until light and fluffy.
  2. Add confectioners' sugar, and beat to combine.
  3. Add flour and sugar, beat until combined.
  4. Add milk and vanilla, beat until light and fully.
Ganache Frosting:
  1. Heat the whipping/heavy cream till small bubbles start appearing around the edges. Turn off the heat. Pour chocolate chips into the cream.
  2. Allow to sit for 30 seconds, and then slowly stir with a rubber spatula until cream and chocolate fully combine, and chocolate melts completely.
  3. Stir in vanilla, and again stir until completely combined. Set aside while you assemble the cake.
Assembly:

  1. Place one layer of brownie cake on your serving platter. Spoon about 1 cup of frosting over the top of the cooled cake, and spread just to the edge of the cake.
  2. Place another layer on top of the first. Press down slightly to secure.
  3. Spoon another 1 cup of frosting over the top of the layer, and spread just to the edges of the cake.
  4. Spoon remaining frosting into a piping bag with a star tip for decorating.
  5. Place top layer of cake over the frosting. Press down slightly to secure.
  6. Place cake in refrigerator for 10 minutes.
  7. Remove chilled cake from refrigerator. Slowly pour about 1/2 cup of ganache over the top of the cake, and using an offset spatula, slowly spread it to the sides of the cake, just barely pushing it over the edge. Add more ganache until you reach your desired coverage.
  8. Place cake back in refrigerator for 20 minutes to allow ganache to firm up.
  9. Pipe decorations around cake, sprinkle with chocolate chips and drizzle with leftover ganache.
  10. Enjoy!

17 September 2014

Banana & Chocolate Muffins

BY Unknown IN , , 2 comments

I haven't been having the best week and I was debating as to whether or not to post something here. But then I thought writing was my outlet, this is where I can think aloud and just have a yarn.

Everything that has happened this week makes me think how different my life is now to what I imagined it would be. How my priorities have changed after marriage, after kids. I was never one of those girls who wanted to have a houseful of babies, who just wanted to get married and have babies and stay home with them. I mean, I was okay with kids but it wasn’t my thing. Kids never found me endearing whereas my husband is just the opposite. Even an absolute stranger baby would just jump into his arms!

I was unprepared for how completely life changing I found motherhood, how I found joy here. People tell you a lot about how much parenting will change your life and they’re right. But usually they mean that you won’t ever sleep in again (you won’t) and a few other things about how much we “give up” to become parents. No one tells you how much you’re going to laugh. No one tells you how much wisdom resides in these small humans, how much they will teach you about love and life and friendship and forgiveness and worship. No one tells you how good and freeing it is to leave your selfishness behind.

Now my husband and my kids are my life, my top priority.Everything else comes second. My heart breaks and aches every time anyone of them gets hurt or upset. I wish I could bear all their aches and pains and wrap them in wool and put them away from harms way. But I know I can't and every ache and pain they go through will only make them stronger. I have to believe that. For them. For me, for my sanity...

Hmmm ok I know I'm getting carried away. As usual. Too much of deep thinking here for a Friday!  I'll stop now. J

Moving on, these have got to be the most delicious banana muffins you'll have ever tasted! Forget those doughy,  banana bran muffins, these banana and chocolate muffins literally melt in your mouth.
This is the sort of recipe to have around when you get one of those calls to say you're getting visitors in a few minutes. I've made this so many times, I almost know the recipe by heart now :)

I had some bananas that were going black and of course chocolate. Come to think of it, I don't think I've ever NOT had chocolate in the house! JJJJJ Anyways, these muffins are a bit on the dense side, but full of flavor and really moist. Plus, they rise up beautifully! These are great for a snack on the go or even breakfast. ENJOY!


Banana & Chocolate Marbled Muffins

Ingredients
1 1/2 cups flour
1 teaspoon baking powder
1/2 teaspoon baking soda
3/4 cup brown sugar (well packed)
150g butter, melted
2 Tablespoons Golden Syrup
2 teaspoons Vanilla Essence
3/4 cup mashed banana
2 eggs
3oz bittersweet chocolate

Method
Preheat the oven to 220 degrees. Grease muffin tins or use muffin tin liners.
Sift the dry ingredients together and make a well in the centre.
Melt the butter and golden syrup together.
Add the vanilla essence and bananas to the butter mix. Then add the eggs.
Pour the liquid mixture into the dry ingredients and mix until just combined.
Remove 1/2 banana batter, mix in 3oz melted chocolate to one half.
To each muffin liner, add 1 medium scoop of banana batter, 1/2 small scoop chocolate batter, 1/2 scoop medium banana batter and finally 1/2 small scoop chocolate batter. Swirl gently with a toothpick.
Bake for 12 minutes or until a skewer comes out clean.


05 September 2014

Kadala/Chickpea Biryani

BY Unknown IN , , , No comments

I just realized pretty much all my recent posts have been something sweet. Tsk Tsk! Naughty me J

And so today’s recipe is a healthy, absolutely yummy one pot meal, that you can quickly whip up and serve warm with a side dish of raita or just plain yogurt. The first time my mom made this for us I was very skeptical because as far as I was concerned biryani must have meat in it. Full Stop. No more discussion. But I've had to eat my words. I didn't know a vegetarian biryani could be just as tasty as a good chicken biryani. The highlight has to be that this is a one pot meal which means less dishes to clean up after J Well, that’s a big plus for me anyway!

And not to mention it so full of protein because of the chickpeas and is quite filling.  It’s a great alternative to the usual rice and thoran (vege side dish for rice).

Kids too will like this dish. Notice I didn't use the word ‘love’ here J I think ‘love’ would be too strong a word. It is still a vegetarian dish after all! J Issac, my fussy eater, crinkled his nose and made clear he did not really approve of it but he still finished everything on his plate, so you be the judge. It might be hard to get the kids to try it, but I think once they've had a taste, they’ll like it for sure! Though I think Issac would rather drop dead than admit he actually liked a rice and chickpea based dish his Amma made for him. Hehehehe JJJ
Apologies for the not-so-great photo!


Kadala/Chickpeas Biryani
Recipe Adapted from Magic Oven, Lakshmi Nair

Ingredients
Basmatic Rice – 2 cups
Chickpeas soaked overnight – 1 cup
Cinnamon stick – ½ inch
Cloves - 3
Star anise -1 or 2
Bay leaves
Cardamom – 2
Turmeric powder – 1/2 tsp
Kashmiri Chili Powder – 1 tsp or as per your spice level requirement
Coriander leaves – 1 handful
Mint leaves – 1 handful
Tomato – 1 medium
Sliced Onion – 1 large
Green Chili – 2 (optional)
Ghee – 2 tbsp
Water – 3 cups

 Method:
1. Wash and soak the rice for 15 mins and drain it.
2. Make the coriander leaves and mint leaves into a paste with little bit of water. Keep aside. This step is entirely optional though, you can even just finely chop the leaves as add as is.
3. Heat the ghee in a pressure cooker and add the whole masalas (cinnamon, cloves, star anise, cardamom & bay leaves) and sauté until nice aroma comes out.
4. Add the onions, green chilies, salt and sauté until they turn translucent.
5. Add the tomatoes and sauté until they turn mushy.
6. Next add red chili powder, and turmeric powder and sauté well. 
7. Then add the coriander leaves and the mint leaves paste and mix well.
8. Add the washed and drained basmati rice and stir gently for about 3 minutes.
9. Now add the chickpeas and the 3 cups of water and close the pressure cooker and let it cook on a medium flame. Once you've heard 2 whistles, switch off the heat and let it rest for 10 to 15 minutes.
10. Once you open the cooker, fluff the rice with a fork rather than a spoon so that the rice does not stick together or break as you stir. Serve hot with some yogurt/cucumber raita.

Notes:
You can even add some chicken masala at Step 5 if you wish.
Another taste enhancer would be to substitute the plain water for chicken stock.

04 September 2014

Best Ever Chocolate Nutella Layer Cake

BY Unknown IN , , , , No comments

A couple of days ago, I made an ever-so secret birthday cake for one of my housemates. Chocolate, naturally: the cast iron crowd-pleaser of cakes. Searching for the perfect recipe, I came across this

Of course I was a bit hesitant at first, as hmm, chocolate cake with Nutella- been there done that. But as I read through her description about how light and smooth and satiny the frosting was and gorgeous the cake looked in the photos, I knew I had to give it a go. But I think the final decision maker was the fact that I could make the frosting/icing using my food processor. Whoohoo! It just can’t get any easier than that! The sour cream in this frosting nicely balances the sweetness of the Nutella and dark chocolate and icing sugar. This is a keeper for sure!

And the chocolate cake recipe? It might just be the best chocolate cake I've ever had. And you know I've had my fair share of chocolate cake. I still love Maria's Ultra Moist Chocolate cake and that would be my first choice for a quick and delicious single layer cake with no icing, but I think this is my definite go to recipe for a rich, moist chocolate cake perfect for layering and frosting.

I’m not kidding when I say this is the cake that will make you a star. It will become your secret weapon for dinner parties and special occasions and you'll never look at another chocolate cake recipe again. JJ


An update; my latest cake with this recipe for another friend's birthday...


Best-Ever Chocolate & Nutella Layer Cake
Recipe Source: Sweetapolita
Yield: One 3-layer, 7-inch round cake

Ingredients
For the Cake:
  • 2 1/4 cups (285 grams) all-purpose flour
  • 2 1/3 cups (470 grams) superfine sugar
  • 3/4 cup (90 grams) dark Dutch-process cocoa powder (I use Cacao Barry Extra Brute)
  • 2 1/2 teaspoons (12 grams) baking soda
  • 2 teaspoons (10 grams) baking powder
  • 1 teaspoon (8 grams) salt
  • 1 1/4 cups (300 ml) buttermilk
  • 3/4 cup (180 ml) brewed coffee or espresso
  • 2/3 cup (160 ml) vegetable oil
  • 3 eggs, room temperature
  • 1 tablespoon (15 ml) pure vanilla extract
For the Frosting:
  • 4 1/2 cups (565 grams) confectioners' sugar
  • 1 1/2 cups (340 grams) unsalted butter, room temperature
  • 1 cup (280 grams) Nutella (or other hazelnut spread)
  • 3/4 cup (180 ml) full-fat sour cream
  • 11 ounces (330 grams) best-quality dark chocolate, melted and cooled slightly
  • 1 tablespoon (15 ml) pure vanilla extract
  • Pinch of salt
Instructions
For the Cake:
  1. Preheat oven to 350° F. Prepare three 7-inch round cake pans with nonstick spray and parchment rounds.
  2. In bowl of electric mixer fitted with the whisk attachment, sift all dry ingredients, including sugar. Combine eggs, buttermilk, coffee, oil and vanilla in a measuring cup and beat lightly with a fork.
  3. Add milk mixture to the dry ingredients mix for 1 minute on medium speed (you may need the plastic splash-guard that comes with mixer). Divide batter evenly among prepared pans--each pan should contain about 600 grams of batter.
  4. Bake the first 2 layers for 20 minutes and rotate pans in oven. Continue to bake until toothpick or skewer comes almost clean (a few crumbs), about 5 more minutes. Cool on wire racks for 20 minutes. Repeat with remaining layer, and then gently invert onto racks until completely cool.
For the Chocolate Frosting:
  1. Put all of the ingredients in a food processor, and pulse until smooth and glossy, about 1 minute. The frosting will be very soft. Refrigerate the frosting until it thickens slightly, about 15 minutes.
Sweetapolita’s Notes:
  • If you don’t have 7-inch round cake pans, you could also use 8-inch cake pans. The layers will just be ever-so-slightly shorter.
  • Because the frosting has sour cream in it, it’s best to refrigerate this cake if it hasn't been gobbled up after a day. Keep refrigerated at that point, and serve at room temperature (although it tastes pretty great cold too).

To make the little sugar flowers I used for decorating the cake, I followed the tutorial here. Its really quite simple and you can make ahead of time and just store in clean, dry and air tight plastic ware until showtime!