21 November 2014

Rava/Semolina Kheer

BY Unknown IN , , , , , , No comments

Whoohoo! Next Friday this time I’m going to be at the Airport waiting for our flight to India. Yes, we are going on holiday for 6 weeks. It’s been almost 2 years since we've been home. This will be Lucas’ first visit to see his grandparents and extended family. I’m so excited! J

I can’t wait to get back home and catch up with family and friends. And the families too are excited to meet Chackochi and see Kochu all grown up. And of course we can’t wait to meet the latest addition to my husband’s family. We have a beautiful little nephew enter the world as of Tuesday this week. Yay!! So I am counting down days and there’s only 6 days to go!

And because I’m going to away for some time I thought I’d put up a few recipes I had floating around and have been meaning to put up , like forever. So brace yourself for an onslaught of delicious recipes in the next few days! Today’s recipe is a sweet dish that you can whip up in less than 30 mins and satisfy that sweet tooth with everyday stuff you’re bound to have in your pantry.

Almost every Indian household is bound to have rava/semolina stocked up. As it’s such a versatile ingredient, you can make amazing dishes with semolina.  The recipe of the day is Rava Kheer. This pudding is easily digestible and it doubles even as a baby food. I’ve been giving this to Chackochi when he was recovering from his viral fever and had not gotten his appetite back. I’d reduce the amount of sugar mentioned in the recipe if you’re going to use it as baby food though.

You can serve the kheer hot, warm or chilled. Here are some pics to drool over if you still haven’t made up your mind if or not to make this delicious pudding. Speaking of which, can you believe I took these pics on my phone and not a professional camera? Look at that clarity! JJ


Rava Kheer/Rava Paysam
Recipe adapted from: Veg Recipes of India
Ingredients
  • 3 tbsp suji/rava/semolina
  • 3 cups milk
  • 1 tblsp condensed milk (optional)
  •  ¼ tsp cardamom powder
  • 2 tbsp cashews
  • 2 tbsp sugar or add as required
  • 1 tbsp ghee
Method
  1. Heat ½ tsp ghee in a pan. Then add cashews and sauté for about a minute on a low flame until golden. Keep aside.
  2. Add the remaining ghee to the pan and add rava to the ghee. Fry till the rava becomes fragrant.
  3. Stir continuously so that the rava gets fried evenly. This takes about 3 to 4 minutes on a low flame.
  4. Add milk and stir.
  5. Add sugar. Stir and bring the rava kheer to a gentle simmer. You can thicken the kheer more if you prefer.
  6. Lastly add cardamom powder and the condensed milk. Stir the rava kheer and switch off the flame.
  7. Serve in individual bowls and garnish with the fried cashews.
  8. Serve yummy rava kheer hot or warm or refrigerate.

Notes:
  • You can leave the condensed milk out if your making this as a baby food
  • You can make it more nutritious by adding some dry fruits like raisins or prunes etc as well. I’d add them in Step 6
  • You can make the kheer as thick or thin as you like. To make it more loose add a bit more milk and don’t simmer as much.
  • Few saffron strands can be added to the kheer too.
  • For a rich flavor, use full fat milk. 


31 October 2014

Chicken Puffs

BY Unknown IN , , , No comments

Yay! The weekend is here again. Thanks to the public holiday on Monday earlier this week; the work week has been a short one. Don’t misunderstand me, I love my job, but I totally love the weekend and time with my family more! JJJ Baaah who am I kidding, a weekend for me just means this; 


Right getting back to business, to kick off an awesome weekend, here’s a recipe for some awesome chicken puffs. Who doesn't love these chicken puffs. Every time we go back home for the holidays and we walk into a bakery, the first thing I’d order is a chicken or egg puffs. I absolutely loved these as a kid. And am sure so did every other kid that grew up in Kerala. Ahh, brings back such fond memories, don’t you agree?These do take a bit of time to make and assemble if you’re doing a bulk lot like I did, but the  end result is totally worth it!


And there’s also a little bonus recipe at the end for what you could do with any leftover pastry strips you have. Chackochi loved those little puff pastry bites I made and gobbled up quite a few of them. Try out these recipes and relive your wonderful childhood memories J


Happy Weekend people!

Chicken Puffs

Ingredients
Chicken thighs - 3
Puffs pastry sheets -  4
Onion - 1 medium
Ginger paste - 1/4 tsp
Garlic paste - 1/4 tsp
Chicken masala – 1 1/2 tsp
Pepper powder as needed
Turmeric powder - 1/4 tsp
Garam Masala - 1/4 tsp
Soya sauce - 2 tblsp
 Egg -  1 (optional)

Instructions
  1. Thaw the puff pastry, as needed, separating the sheets at room temperature. Thaw until completely and evenly moist, but not dry.
  2. Cook the chicken in a pressure cooker with the soya sauce, turmeric powder & pepper powder. After cooling down, shred the chicken and keep it aside. Reserve some of the chicken stock.
  3. Heat oil in a pan and add onion and salt. Sauté well. When it turns light brown, add ginger-garlic paste and mix well. Add chicken masala, garam masala and pepper powder into this mixture. Once the raw smell goes, add the chicken to this and mix well. If the mix is on the dry side, add a bit of the chicken stock and combine well. Keep aside.
  4. Heat the oven to 190 degrees C.
  5. Meanwhile, cut the pastry into medium sized squares. Don’t worry about wasting the pastry, I have a quick recipe to use those up too, just scroll down .
  6. Spread the masala mix onto the puff pastry. lengthwise. Rub all the sides of the inner part of the pastry with a bit of water so that it acts as an adhesive. Fold the puff pastry over the masala and seal it. Place the puffs about 2 inches apart on a baking sheet lined with parchment paper.
  7. Whip up the egg in a bowl. Brush the top of the pastry with the egg wash. This will give the puffs a nice golden color when baked.
  8. Bake it until it has puffed up nicely & golden brown.  Take care not to overcook or else the bottom of the puffs may burn. Serve warm. Yum!


Sweet Puff Pastry Bites 
Now for those little strips of left over pastry, just roll or fold them up into little shapes as you like, bake until golden. Once cooled, dust them with some icing sugar to coat and devour! Yummy, yum yum!

29 October 2014

Tres Leches Cake with Strawberry Compote & Whipped Cream Frosting

BY Unknown IN , , , , No comments

The long weekend has just passed and I feel like I need another weekend to get over my long weekend. Yawn! J

Someone very near & dear to our family was celebrating her birthday last weekend and of course we wanted to surprise her with a cake. We conspired with her kids and everyone made out that she was just too old to have birthday cakes anymore and so they would just do dinner out and not make too much of a fuss. Oh, loved the look on her face when we brought in the cake!

Again, I went through the whole confused and overwhelmed with ideas phase before I decided on this cake. I wanted to move away from our traditional chocolate cake as everyone just expects it as a birthday cake.  But I didn't want to do a vanilla cake either as I didn't trust my icing skills enough to take a plain vanilla cake to the next level with its deliciousness. I toyed around the idea of doing a marble cake with mocha icing but of course my “buddy” said it was too simple for a birthday cake and that I should expand my baking horizons JJJ

So while searching high and low for an awesome cake which was simple enough for me to pull off, I came across this cake on Raspberri Cupcakes and I was drawn to it instantly. It just sounded divine and when I looked at the recipe it just seemed too simple to be true.

And so with my “buddy’s” approval I decided on this cake even though I was very apprehensive about the whipped cream icing. I haven’t mastered whipping up cream to perfection yet; I always either over beat it or under beat it! But I was up for the challenge and thought I could always just make a vanilla butter cream icing if whipped cream failed me J But that was the novice baker in me speaking. Let me tell you now, butter cream wouldn't have done justice to cake like the whipped cream. It just has to be whipped cream icing or nothing!

The Tres Leches cake (Spanish for 3 milks cake) is one of those absolutely must try before you die type of cakes!  The preparation is similar to a "poke" cake, where a cake is first baked, then poked and a mixture poured over it. I was a bit apprehensive about layering a cake that was soaked in three types of milk. Wouldn't it be all soggy and fall apart when I try and layer it? But then I trusted the experts and went for it. And I am so glad I did. The cake is so moist and light without being too soggy or coming apart as soon as you touch it.

Three forms of leche, or "milk," are poured over a baked cake to create its signature indulgence evaporated milk, sweetened condensed milk, and heavy cream.  And then adding whipped cream and fruit to a classic tres leches cake recipe just made it undeniably delicious. You can use any fruit in season, alone or a combination and you just can’t go wrong. The original recipe uses rose water to flavor the Strawberry compote which I think would be divine but I didn't have any on hand and so gave it a miss. But the compote still tasted quite good on its own.

The cake as such is pretty simple to make with very few ingredients.  And the milk syrup is just combining all 3 milks and pour. Voila! J


Tres Leches Cake with Strawberry Compote & Whipped Cream Frosting
Recipe Source:  Raspberri Cupcakes
(makes a 2-layer 8 inch round cake)

Ingredients:
For the cake:
1 cup plain (all-purpose) flour
1&1/2 tsp baking powder
1/4 teaspoon salt
5 eggs
1 cup (225g) caster (superfine) sugar
1 tsp pure vanilla extract/vanilla bean paste
1/3 cup milk

For the milk syrup:
3/4 cup evaporated milk
1/3 cup sweetened condensed milk
1/3 cup thickened (heavy) cream

Instructions:
  1. Preheat oven to 180°C (350°F, reduce by 10° if fan-forced). Grease and line two 8 inch or 9 inch (I used 8”) round baking tin with baking paper.
  2. Combine flour, baking powder, and salt in a large mixing bowl and set aside.
  3. Separate eggs. Beat egg yolks with 3/4 cup sugar on high speed until yolks are pale yellow.
  4. Stir in milk and vanilla.
  5. Pour egg yolk mixture over the flour mixture and stir very gently until combined.
  6. Beat egg whites on high speed until soft peaks form. With the mixer on, gradually add 1/4 cup sugar and beat until egg whites are stiff but not dry.
  7. Fold egg white mixture into the batter very gently until just combined, make sure there are no lumps.
  8. Pour equal amounts into prepared tins and spread to even out the surfaces. Bake for 20 to 35 minutes or until the center of the cake springs back when lightly pressed and a toothpick comes out clean. Turn cakes out onto two rimmed plates and allow to cool. 
  9. Combine condensed milk, evaporated milk, and heavy cream in a small pitcher.
  10. When cake is cool, pierce the surface all over with a fork several times. Slowly drizzle the milk mixture; try to get as much around the edges of the cake as you can.
  11. Allow the cake to absorb the milk mixture for at least 30 minutes.

For the strawberry compote:
500g (2 punnets) fresh or frozen strawberries
4 tbsp sugar
2 tbsp lemon juice + 2 tsp lemon zest
1/2 tsp rose water  (optional)

  1. Place strawberries, sugar and lemon juice and zest in a small saucepan on medium heat, stirring until it comes to a simmer.
  2. Continue to cook, stirring regularly for about 5-10 mins or until mixture thickens slightly and strawberries soften.
  3. Remove from heat and stir in the rose water. Cool completely, can be stored in an airtight container in the fridge for about 2 weeks.


To assemble cake:
600ml thickened (heavy) cream
2 tbsp icing sugar
To decorate: strawberry flavored wafer sticks, sprinkles (optional)

  1. Place cream and icing sugar in a large mixing bowl and beat on high until soft peaks form (take care not to over mix).
  2. Carefully transfer one of the soaked cakes to your cake stand/plate. Cover with a thin layer of strawberry compote (too much will cause the compote to ooze out the sides of the cake).
  3. Sandwich second cake on top. Use a spatula to cover the entire cake in whipped cream and smooth.
  4. Decorate to your hearts content.. Serve immediately with leftover strawberry compote or chill until ready to serve. Can be stored in an airtight container for 2 days.


23 October 2014

Chocolate Biscuit Pudding

BY Unknown IN , , , No comments

My mind is blank… Today I have no musings or craziness to share with you.  Maybe that’s a good thing. Don’t want to scare you off with all my crazy talk J so let’s just dive straight into today’s yummy recipe.  If you are searching for an easy dessert recipe, then look no further. This chocolate biscuit pudding is a perfect choice. It is so simple to prepare, the ingredients are stuff you’d usually already have in your pantry and the good thing is that it can be prepared a day ahead making it a perfect choice for entertaining guests. 


The actual recipe from Ria’s Collection is perfect as is. I do variations of it each time I make it. The one I’m posting here today has butterscotch custard topping instead of Ria’s whipped cream layer. There are so many ways you could do this and still be sure it would come out tasting awesome every time. You just can’t go wrong with this J

I just used store bought butter scotch custard. If you don’t have any custard or whipped cream handy just do the biscuit and chocolate layers and forget the 3rd layer and still get a yummy dessert. Like I said, the possibilities are endless!


Chocolate Biscuit Pudding
Recipe Source: Ria's Collection

Ingredients:
Marie biscuits, crushed- 200 gms( about 40 biscuits)
Salted Butter- 100 gms( about 1/2 cup)
Milk-1 1/2 Cups
Sugar- 1 Cup
Cocoa powder- 3 tbsp
Cornflour-2 tbsp
Vanilla extract-1 tsp
Custard – as needed, around 1 cup (optional)
Dark chocolate squares - for garnishing (optional)

Instructions:
  1. In a bowl, mix together the crushed biscuits and butter until soft and sand like. Spoon in half of it into the dessert glasses and press it with a spoon and level it. Keep aside the remaining biscuit crumbs.
  2. In a sauce pan, combine milk, sugar, cocoa powder and corn flour. Mix well until combined. Heat until thick, whisking continuously. Allow it to cool and then add in the vanilla.
  3. Add a layer of the prepared chocolate pudding to the glasses, repeat layers finishing off with biscuit crumbs.
  4. Top it with the custard or whipped cream, if desired. Refrigerate for about 3 to 4 hours. Serve cold. 
  5. You could also decorate it with a small piece of dark chocolate or even sprinkle bits of 100’s & 1000’s or a bit of leftover biscuit crumbs! J J


 Enjoy!

17 October 2014

Poori Bhajji

BY Unknown IN , , , No comments

I know the posts have become a little irregular these days; I got a bit side tracked with my boys and illnesses. Thankfully, everyone’s back to their good health now and so here I am J

Right now I’m going TGIF! It’s been an emotionally draining last couple of weeks and I’m so looking forward to the weekend and spending time with my darling’s.

Speaking of darlings, my boys are as mischievous and cheeky as ever. They are growing up so fast. Kochu is quite the chatter box. Chatter, chatter, chatter! All day long if he can help it! J And Chackochi too is starting to say stuff, though most of it is still baby talk. Of the few words we can understand he loves to say “No”, “Stop it”, “oh oh” and “Mama”. He goes around calling everyone Mama, even our housemate! He’s getting teeth left and right and so his looks are changing fast. Here are a few long overdue pics of them J


Right, so today’s recipe is Poori Bhajji. Doesn’t your mouth just water thinking of those deliciously hot, crispy golden balls of whole wheat goodness paired with that simple vegan potato curry.. Ooh Yum! So a couple of weekends ago, we had some guests over and I made this. I wouldn’t generally recommend making this when you have guests, only because poori is best served hot and you really don’t want to be toiling over the stove when you have guests waiting. But my hubby has been craving Pooris for quite some time and so he talked me into making these.

I forgot to take a photo with the Poori and Bhajji all plated together. I had to take a pic later on of the bhajji as I totally forgot in the hurry of serving our guests.  I do have a few pics of the poori though as I got hubby to snap some as we made it.


It’s a real simple meal yet astonishingly tasty and filling. The kids didn’t want much to do with the curry but both of them had a couple of pooris and loved it. It’s definitely one of those worth the effort kind of dishes. The Bhajji is pretty simple to make and comes together pretty soon and tastes pretty close to what we’d get at the Aryas hotels in Kerala. Do try it. Happy Cooking & have a great weekend!

Poori Bhajji
For the Poori: (makes 15-18 pooris)
Recipe Source : Veg Recipes of India
2.5 to 3 cups whole wheat flour/atta
1 tsp oil
water to knead the flour
oil for frying

Method:
Knead the wheat flour into stiff dough with water and oil. Make small balls of the dough. Roll into rounds having 4-5 inches diameter.


Heat oil for deep frying. Fry the pooris in oil till they get puffed and are golden brown.


Tips for Preparing Poori:
  • The dough should be slightly stiff not soft like the dough of the chappati/roti
  • While rolling the poori, apply a little oil on the poori and then roll. This way, you won’t need to dust the rolling board with wheat flour. This ensures that the oil stays clean when you fry the pooris and you won’t see dark burnt flour particles inside the oil.
  • Make sure the oil is neither too hot nor cold. If  too hot, the pooris get browned quickly. If not hot enough then the pooris absorb oil and become too oily.
  • The pooris should puff while frying. If not, then something has gone wrong….. Either the dough has not been kneaded well or the pooris have not been rolled out evenly or the oil is not hot enough.
  • You can also add some suji/semolina to the pooris. It makes the poori a crispier.
For the Potato Bhajji/ Potato Masala
Recipe Source : Jeyshris Kitchen
Ingredients:

Boiled Potato – 3
Onion (big) – 2
Green chilli – 2-3
Ginger – small piece
Kadala Mavu – 1 tblsp
Turmeric Powder – ¼ tsp
Garam Masala- small pinch
Mustard seeds  - ¼ tsp
Urad dal/Uluva – ¼ tsp
Curry leaves/Karivepella 
Coriander leaves
Lemon juice – few drops
Oil – 2 tblsp
Salt – as needed 

Method:
1. Peel the skin of the boiled potatoes and mash two of them. Cut the remaining one into cubes.
2. Thinly slice the onions and finely chop the curry leaves and green chilli.
3. Grate the ginger. 
4. In a pan, add oil and throw in the mustard seeds, urad dal, ginger, green chilli and curry leaves.
5. When the urad dal turns golden brown, add the sliced onions and sauté for few minutes till the onions becomes translucent.
6. Now add 1/2 a cup of water to this and cook the onions for a minute.
7. When done, add the mashed and cubed potatoes.
8. Make a paste with besan/ kadala maavu in 2 tblsp of water and mix well without any lumps.
9. Add this to the potato mixture and add salt, turmeric powder and garam masala. Add 1 cup of water to bring this to a gravy consistency.
10. This masala will absorb water once it comes to boil. So don’t worry if it is thin.
11. Switch off the flame and garnish with coriander leaves.
12. Add lemon juice (if using).


19 September 2014

Chocolate Brownie Cake with Cookie Dough Filling

BY Unknown IN , , , , No comments

I made this cake for a family friend’s birthday, Uncle V J. It was meant to be a surprise as he didn't know we were doing this for him. It was fun conspiring with his kids and sneaking into the house to decorate it while Aunty lured him away from the house saying she needed to get some fresh air! 


I’m not sure why I chose this cake. I wanted to try something different and I've never had a brownie cake with cookie dough filling before. And now that I've tried it, I’m not entirely sure I’d make it again. No fault of the cake though. The cake was perfect just as the recipe said it would be. The cake layers were typical brownies – chewy, chocolaty and moist. Not sure what else I’d expected from a brownie cake. Duh!

It was Yum, don’t get me wrong, but I think it was just personal preference. Everyone else thought the cake was nice (or they were being really polite!!! JJJ) but I think I prefer my cakes to be light, moist and definitely not chewy. So as you’d have guessed by now, I’m not a huge fan of brownies or fudge.

Then why the heck did I make this cake, you ask? Beats me!!!!! This just looked so decadent in the photos at Lemon Sugar, I just couldn't resist.

The cake is rich, dense and prefect for the chocolate lover. It might be even more awesome with some whipped cream or even some French vanilla ice cream. As far as layer cakes go, this has to be the easiest cake to make. Just bake the brownie layers, make the filling and pour over the ganache. Tada!!!! JJ

Don’t let me put you off this cake, it is really decadent and yummy, just not my absolute favorite cake. You should have a go and tell me what you think. You never know I could be totally wrong and this could be “The” cake from Heaven for you! JJ

I followed Lemon Sugar’s recipe for the cake and filling but slightly adapted the ganache recipe as I didn't have any corn syrup on hand and couldn't be bothered going to the supermarket at 11pm at night. I think that might be why my ganache didn't turn out as glossy as hers. You can check out the original recipe here.


Chocolate Brownie Cake with Cookie Dough Filling
Recipe Source: Lemon Sugar

Ingredients
Brownie Cake:
1 and 1/2 cups vegetable oil
3 cups sugar
3 teaspoons vanilla extract
6 eggs
1 and 1/2 cups flour
1 cup cocoa powder
3/4 teaspoon baking powder
1/4 teaspoon salt

Cookie Dough Filling:
3 sticks unsalted butter, at room temperature
3/4 cup light brown sugar, packed
3 and 1/2 cups confectioners’ sugar
1 cup all-purpose flour
3/4 teaspoon salt
3 Tablespoons milk
2 and 1/2 teaspoons vanilla extract

Ganache Frosting:
1/4 cup + 2tblsp heavy whipping cream
2 teaspoons vanilla extract
3/4 cup Chocolate chips
Extra chocolate chips, for garnish

Method:
Brownies:
  1. Pre-heat oven to 350 degrees (F).
  2. Prepare three 8-inch round baking pans with cooking spray and parchment.
  3. In a large bowl, combine sugar and oil. Stir with a large wooden spoon until completely combined.
  4. Add eggs one at a time, stirring and incorporating each completely before adding another.
  5. Add vanilla, stir to combine.
  6. In a medium bowl, combine dry ingredients (flour, cocoa powder, salt and baking powder.) Whisk to combine.
  7. Add dry ingredients a little bit at a time, stirring until just absorbed each time. I added mine in 3 batches. Do not over-mix, just stir until dry ingredients are fully incorporated.
  8. Pour batter evenly into three prepared pans.
  9. Bake for 20-25 minutes, or until a toothpick comes out with wet crumbs.
  10. Cool completely, then remove from pans and set aside.
  11. Prepare filling.
Cookie Dough Filling:
  1. In a large bowl (I used my stand mixer) beat butter and brown sugar until light and fluffy.
  2. Add confectioners' sugar, and beat to combine.
  3. Add flour and sugar, beat until combined.
  4. Add milk and vanilla, beat until light and fully.
Ganache Frosting:
  1. Heat the whipping/heavy cream till small bubbles start appearing around the edges. Turn off the heat. Pour chocolate chips into the cream.
  2. Allow to sit for 30 seconds, and then slowly stir with a rubber spatula until cream and chocolate fully combine, and chocolate melts completely.
  3. Stir in vanilla, and again stir until completely combined. Set aside while you assemble the cake.
Assembly:

  1. Place one layer of brownie cake on your serving platter. Spoon about 1 cup of frosting over the top of the cooled cake, and spread just to the edge of the cake.
  2. Place another layer on top of the first. Press down slightly to secure.
  3. Spoon another 1 cup of frosting over the top of the layer, and spread just to the edges of the cake.
  4. Spoon remaining frosting into a piping bag with a star tip for decorating.
  5. Place top layer of cake over the frosting. Press down slightly to secure.
  6. Place cake in refrigerator for 10 minutes.
  7. Remove chilled cake from refrigerator. Slowly pour about 1/2 cup of ganache over the top of the cake, and using an offset spatula, slowly spread it to the sides of the cake, just barely pushing it over the edge. Add more ganache until you reach your desired coverage.
  8. Place cake back in refrigerator for 20 minutes to allow ganache to firm up.
  9. Pipe decorations around cake, sprinkle with chocolate chips and drizzle with leftover ganache.
  10. Enjoy!

17 September 2014

Banana & Chocolate Muffins

BY Unknown IN , , 2 comments

I haven't been having the best week and I was debating as to whether or not to post something here. But then I thought writing was my outlet, this is where I can think aloud and just have a yarn.

Everything that has happened this week makes me think how different my life is now to what I imagined it would be. How my priorities have changed after marriage, after kids. I was never one of those girls who wanted to have a houseful of babies, who just wanted to get married and have babies and stay home with them. I mean, I was okay with kids but it wasn’t my thing. Kids never found me endearing whereas my husband is just the opposite. Even an absolute stranger baby would just jump into his arms!

I was unprepared for how completely life changing I found motherhood, how I found joy here. People tell you a lot about how much parenting will change your life and they’re right. But usually they mean that you won’t ever sleep in again (you won’t) and a few other things about how much we “give up” to become parents. No one tells you how much you’re going to laugh. No one tells you how much wisdom resides in these small humans, how much they will teach you about love and life and friendship and forgiveness and worship. No one tells you how good and freeing it is to leave your selfishness behind.

Now my husband and my kids are my life, my top priority.Everything else comes second. My heart breaks and aches every time anyone of them gets hurt or upset. I wish I could bear all their aches and pains and wrap them in wool and put them away from harms way. But I know I can't and every ache and pain they go through will only make them stronger. I have to believe that. For them. For me, for my sanity...

Hmmm ok I know I'm getting carried away. As usual. Too much of deep thinking here for a Friday!  I'll stop now. J

Moving on, these have got to be the most delicious banana muffins you'll have ever tasted! Forget those doughy,  banana bran muffins, these banana and chocolate muffins literally melt in your mouth.
This is the sort of recipe to have around when you get one of those calls to say you're getting visitors in a few minutes. I've made this so many times, I almost know the recipe by heart now :)

I had some bananas that were going black and of course chocolate. Come to think of it, I don't think I've ever NOT had chocolate in the house! JJJJJ Anyways, these muffins are a bit on the dense side, but full of flavor and really moist. Plus, they rise up beautifully! These are great for a snack on the go or even breakfast. ENJOY!


Banana & Chocolate Marbled Muffins

Ingredients
1 1/2 cups flour
1 teaspoon baking powder
1/2 teaspoon baking soda
3/4 cup brown sugar (well packed)
150g butter, melted
2 Tablespoons Golden Syrup
2 teaspoons Vanilla Essence
3/4 cup mashed banana
2 eggs
3oz bittersweet chocolate

Method
Preheat the oven to 220 degrees. Grease muffin tins or use muffin tin liners.
Sift the dry ingredients together and make a well in the centre.
Melt the butter and golden syrup together.
Add the vanilla essence and bananas to the butter mix. Then add the eggs.
Pour the liquid mixture into the dry ingredients and mix until just combined.
Remove 1/2 banana batter, mix in 3oz melted chocolate to one half.
To each muffin liner, add 1 medium scoop of banana batter, 1/2 small scoop chocolate batter, 1/2 scoop medium banana batter and finally 1/2 small scoop chocolate batter. Swirl gently with a toothpick.
Bake for 12 minutes or until a skewer comes out clean.


05 September 2014

Kadala/Chickpea Biryani

BY Unknown IN , , , No comments

I just realized pretty much all my recent posts have been something sweet. Tsk Tsk! Naughty me J

And so today’s recipe is a healthy, absolutely yummy one pot meal, that you can quickly whip up and serve warm with a side dish of raita or just plain yogurt. The first time my mom made this for us I was very skeptical because as far as I was concerned biryani must have meat in it. Full Stop. No more discussion. But I've had to eat my words. I didn't know a vegetarian biryani could be just as tasty as a good chicken biryani. The highlight has to be that this is a one pot meal which means less dishes to clean up after J Well, that’s a big plus for me anyway!

And not to mention it so full of protein because of the chickpeas and is quite filling.  It’s a great alternative to the usual rice and thoran (vege side dish for rice).

Kids too will like this dish. Notice I didn't use the word ‘love’ here J I think ‘love’ would be too strong a word. It is still a vegetarian dish after all! J Issac, my fussy eater, crinkled his nose and made clear he did not really approve of it but he still finished everything on his plate, so you be the judge. It might be hard to get the kids to try it, but I think once they've had a taste, they’ll like it for sure! Though I think Issac would rather drop dead than admit he actually liked a rice and chickpea based dish his Amma made for him. Hehehehe JJJ
Apologies for the not-so-great photo!


Kadala/Chickpeas Biryani
Recipe Adapted from Magic Oven, Lakshmi Nair

Ingredients
Basmatic Rice – 2 cups
Chickpeas soaked overnight – 1 cup
Cinnamon stick – ½ inch
Cloves - 3
Star anise -1 or 2
Bay leaves
Cardamom – 2
Turmeric powder – 1/2 tsp
Kashmiri Chili Powder – 1 tsp or as per your spice level requirement
Coriander leaves – 1 handful
Mint leaves – 1 handful
Tomato – 1 medium
Sliced Onion – 1 large
Green Chili – 2 (optional)
Ghee – 2 tbsp
Water – 3 cups

 Method:
1. Wash and soak the rice for 15 mins and drain it.
2. Make the coriander leaves and mint leaves into a paste with little bit of water. Keep aside. This step is entirely optional though, you can even just finely chop the leaves as add as is.
3. Heat the ghee in a pressure cooker and add the whole masalas (cinnamon, cloves, star anise, cardamom & bay leaves) and sauté until nice aroma comes out.
4. Add the onions, green chilies, salt and sauté until they turn translucent.
5. Add the tomatoes and sauté until they turn mushy.
6. Next add red chili powder, and turmeric powder and sauté well. 
7. Then add the coriander leaves and the mint leaves paste and mix well.
8. Add the washed and drained basmati rice and stir gently for about 3 minutes.
9. Now add the chickpeas and the 3 cups of water and close the pressure cooker and let it cook on a medium flame. Once you've heard 2 whistles, switch off the heat and let it rest for 10 to 15 minutes.
10. Once you open the cooker, fluff the rice with a fork rather than a spoon so that the rice does not stick together or break as you stir. Serve hot with some yogurt/cucumber raita.

Notes:
You can even add some chicken masala at Step 5 if you wish.
Another taste enhancer would be to substitute the plain water for chicken stock.

04 September 2014

Best Ever Chocolate Nutella Layer Cake

BY Unknown IN , , , , No comments

A couple of days ago, I made an ever-so secret birthday cake for one of my housemates. Chocolate, naturally: the cast iron crowd-pleaser of cakes. Searching for the perfect recipe, I came across this

Of course I was a bit hesitant at first, as hmm, chocolate cake with Nutella- been there done that. But as I read through her description about how light and smooth and satiny the frosting was and gorgeous the cake looked in the photos, I knew I had to give it a go. But I think the final decision maker was the fact that I could make the frosting/icing using my food processor. Whoohoo! It just can’t get any easier than that! The sour cream in this frosting nicely balances the sweetness of the Nutella and dark chocolate and icing sugar. This is a keeper for sure!

And the chocolate cake recipe? It might just be the best chocolate cake I've ever had. And you know I've had my fair share of chocolate cake. I still love Maria's Ultra Moist Chocolate cake and that would be my first choice for a quick and delicious single layer cake with no icing, but I think this is my definite go to recipe for a rich, moist chocolate cake perfect for layering and frosting.

I’m not kidding when I say this is the cake that will make you a star. It will become your secret weapon for dinner parties and special occasions and you'll never look at another chocolate cake recipe again. JJ


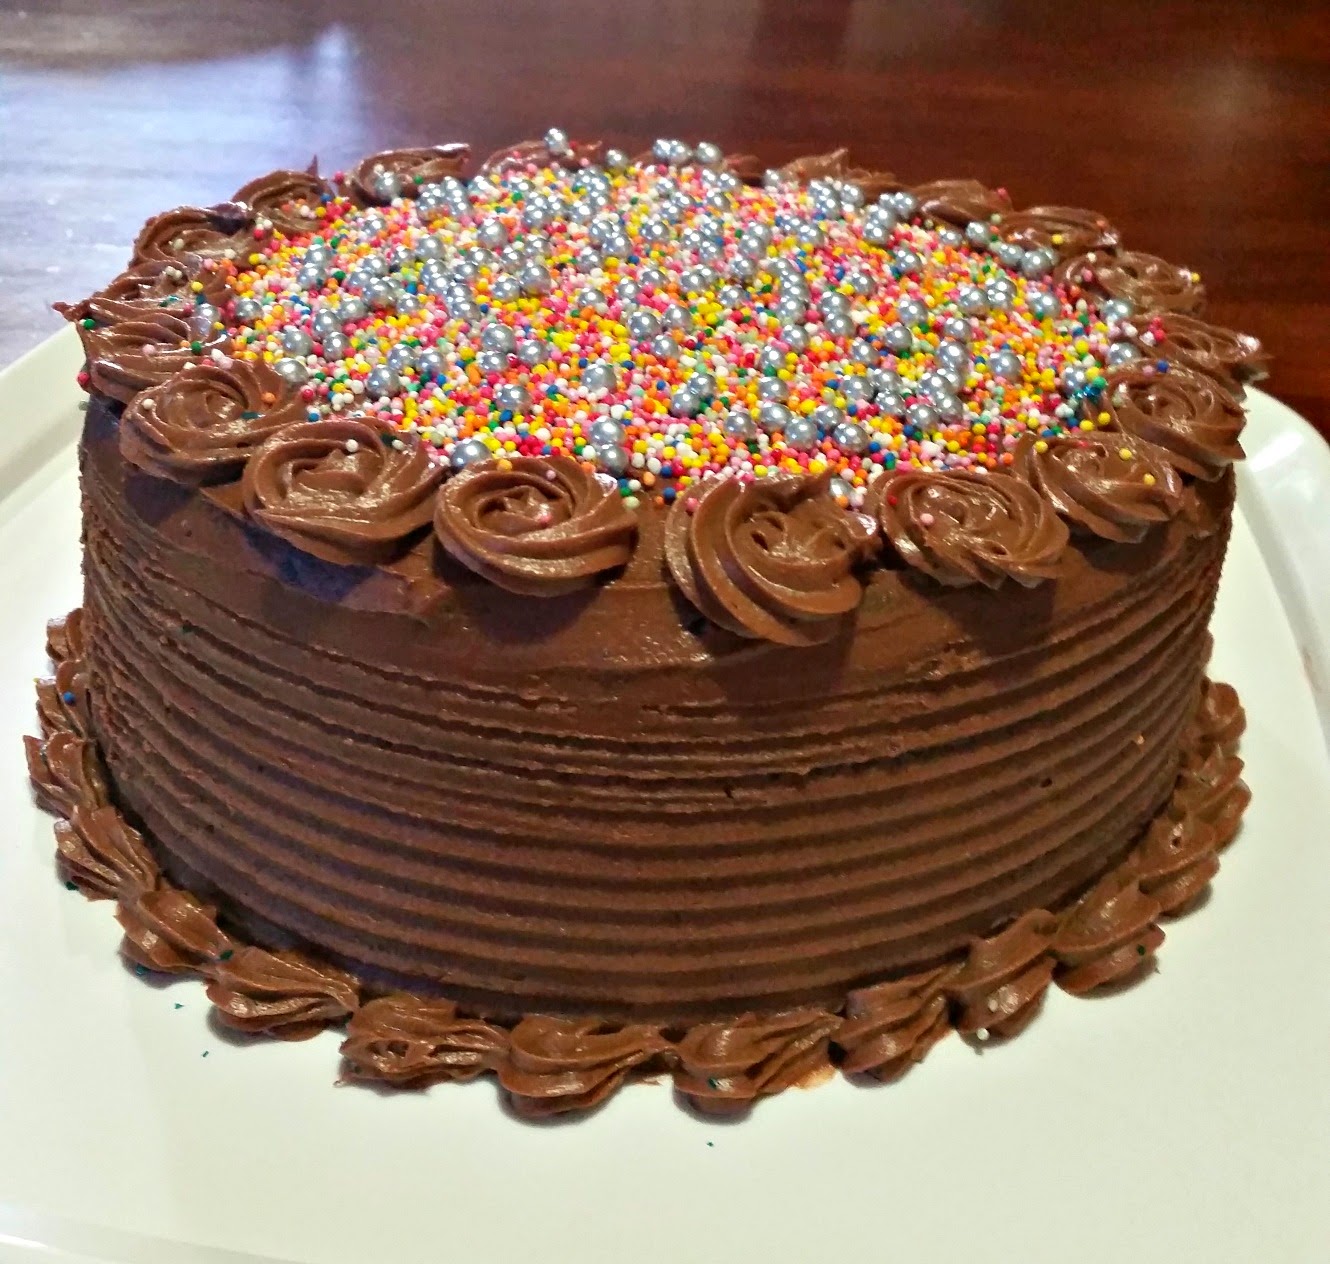
An update; my latest cake with this recipe for another friend's birthday...


Best-Ever Chocolate & Nutella Layer Cake
Recipe Source: Sweetapolita
Yield: One 3-layer, 7-inch round cake

Ingredients
For the Cake:
  • 2 1/4 cups (285 grams) all-purpose flour
  • 2 1/3 cups (470 grams) superfine sugar
  • 3/4 cup (90 grams) dark Dutch-process cocoa powder (I use Cacao Barry Extra Brute)
  • 2 1/2 teaspoons (12 grams) baking soda
  • 2 teaspoons (10 grams) baking powder
  • 1 teaspoon (8 grams) salt
  • 1 1/4 cups (300 ml) buttermilk
  • 3/4 cup (180 ml) brewed coffee or espresso
  • 2/3 cup (160 ml) vegetable oil
  • 3 eggs, room temperature
  • 1 tablespoon (15 ml) pure vanilla extract
For the Frosting:
  • 4 1/2 cups (565 grams) confectioners' sugar
  • 1 1/2 cups (340 grams) unsalted butter, room temperature
  • 1 cup (280 grams) Nutella (or other hazelnut spread)
  • 3/4 cup (180 ml) full-fat sour cream
  • 11 ounces (330 grams) best-quality dark chocolate, melted and cooled slightly
  • 1 tablespoon (15 ml) pure vanilla extract
  • Pinch of salt
Instructions
For the Cake:
  1. Preheat oven to 350° F. Prepare three 7-inch round cake pans with nonstick spray and parchment rounds.
  2. In bowl of electric mixer fitted with the whisk attachment, sift all dry ingredients, including sugar. Combine eggs, buttermilk, coffee, oil and vanilla in a measuring cup and beat lightly with a fork.
  3. Add milk mixture to the dry ingredients mix for 1 minute on medium speed (you may need the plastic splash-guard that comes with mixer). Divide batter evenly among prepared pans--each pan should contain about 600 grams of batter.
  4. Bake the first 2 layers for 20 minutes and rotate pans in oven. Continue to bake until toothpick or skewer comes almost clean (a few crumbs), about 5 more minutes. Cool on wire racks for 20 minutes. Repeat with remaining layer, and then gently invert onto racks until completely cool.
For the Chocolate Frosting:
  1. Put all of the ingredients in a food processor, and pulse until smooth and glossy, about 1 minute. The frosting will be very soft. Refrigerate the frosting until it thickens slightly, about 15 minutes.
Sweetapolita’s Notes:
  • If you don’t have 7-inch round cake pans, you could also use 8-inch cake pans. The layers will just be ever-so-slightly shorter.
  • Because the frosting has sour cream in it, it’s best to refrigerate this cake if it hasn't been gobbled up after a day. Keep refrigerated at that point, and serve at room temperature (although it tastes pretty great cold too).

To make the little sugar flowers I used for decorating the cake, I followed the tutorial here. Its really quite simple and you can make ahead of time and just store in clean, dry and air tight plastic ware until showtime!


27 August 2014

NUTELLA POUND CAKE

BY Unknown IN , , , , No comments

You know how you'd be sitting in the car waiting for the traffic light to turn green and your minds wanders and you think of random things or replay something that happened the day before? No?  Not Really?? I do that very often! Maybe it’s just me J . So this morning I was waiting for one such light to turn green and Kochu’s face came into mind. How he smiled at me when I offered him a whipped cream covered cake bowl to lick yesterday. He smiled, and was amazed I let him get all sticky and messy!

Remembering his and Chackochi’s expressions made me think, when I’m gone, what will Kochu remember the most about me? Yes, of all the things I could have thought about, this is what came into my mind. But seriously, when I’m dead and long gone, I hope Kochu will remember me for letting him lick the cake mixer bowl clean before he remembers me yelling at him for wrenching Chackochis arm when he wants Chackochi to come with him.

Kochu’s at that age where I am constantly yelling “No!” and “Stop!” on a regular basis. L He is always doing things he shouldn’t be doing and he knows that he shouldn’t be doing. This means I yell at Kochu… a lot. Certainly a lot more than I let him lick the cake bowl.  Oh dear… Hmmm how depressing!
Alright, so mental note, even if I don’t stop yelling so very often at Kochu, at least make sure I let him have fun just as much too. So that when I’m gone, he’ll remember me for the fun we had together  J

I know what you are thinking; I’m crazy but don’t you think about stuff like this too?? J

Right, crazy talk aside, today’s recipe is for the best ever Pound Cake I’ve ever had! The cake was literally gone in a couple of hours so it was a definite hit. Everyone asked for seconds and thirds. I haven’t made a cake that was this popular before.


And the of course addition of Nutella to it just takes it up a notch. You can omit the Nutella and make just the cake. I swear it will still taste just as heavenly. I made another variation of this as well a Butter Brownie Cake which was just as good. I’ll put up the recipe soon. But this is a definite must try recipe and I promise you’ll never look for another pound cake recipe again!

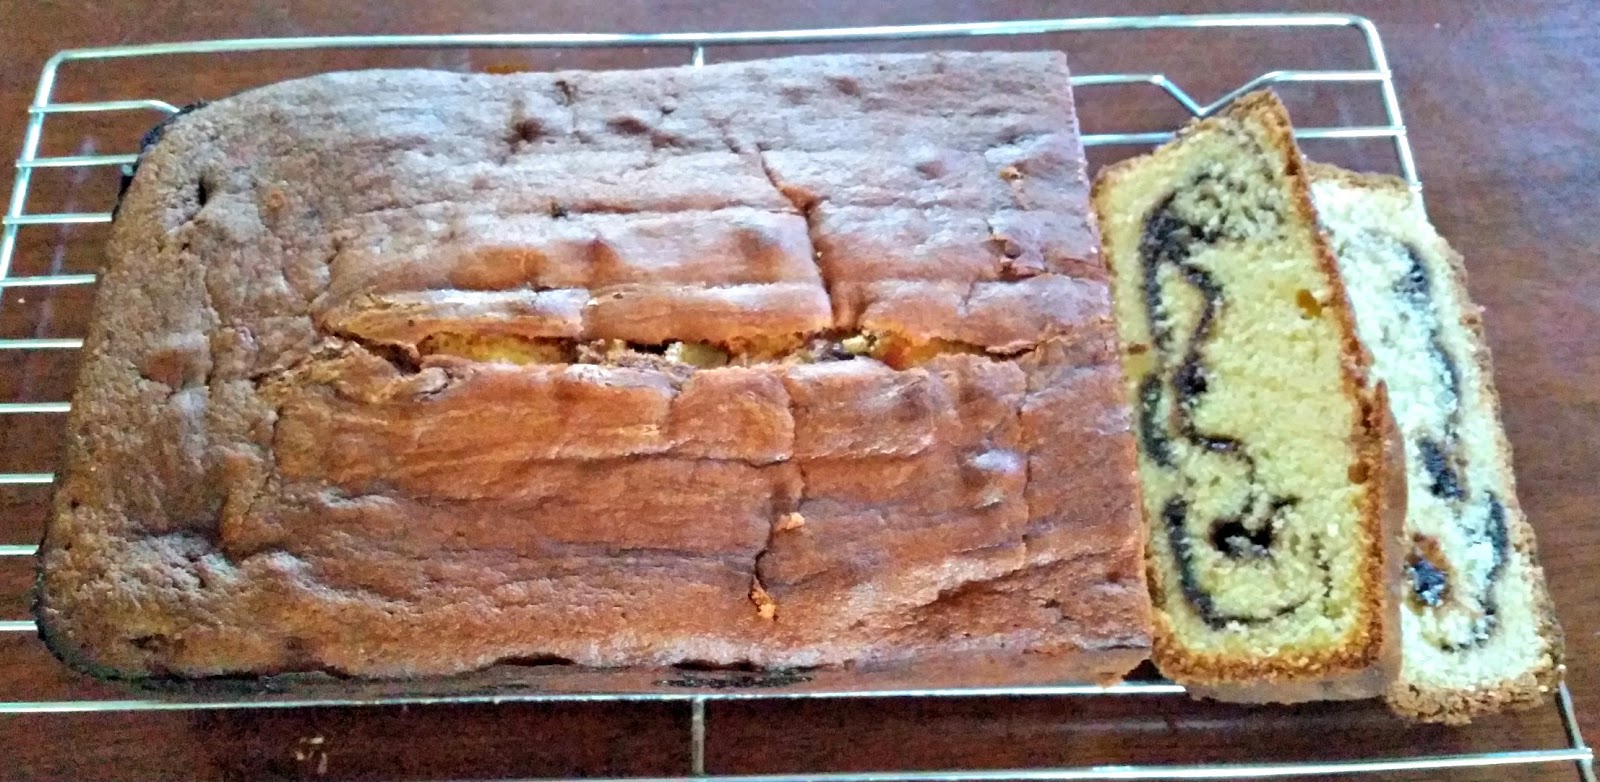
The original recipe actually layers the Nutella on quite thickly, but I didn’t put on as much and so my cake looked more like a marbled tea cake than a Nutella Layered Pound Cake. But the next time I make this (probably very soon!) I might actually layer the Nutella as thick as the original recipe does too. Oh my waistline is definitely not going to thank me for it, but all for the love of food, right?! J


NUTELLA POUND CAKE
Recipe Source:  RasaMalaysia
Makes one 9”x5” Loaf pan

INGREDIENTS:
1 1/2 cups all-purpose flour, plus more for dusting
4 large eggs, at room temperature
2 teaspoons pure vanilla extract
3/4 teaspoon baking powder
1/4 teaspoon salt
2 sticks (8 oz / 225 g / 1 cup) unsalted butter, softened
1 1/4 cups sugar (I used 1 cup)
One 13-ounce (350 g) jar Nutella

METHOD:
1.       Preheat the oven to 325°F (160°C). Lightly grease and flour a 9-by-5-inch loaf pan, tapping out any excess flour.
2.       In a glass measuring cup, lightly beat the eggs with the vanilla.
3.       In a medium bowl, whisk the 1 1/2 cups of flour with the baking powder and salt.
4.       In a large bowl, using a handheld mixer, beat the butter with the sugar at medium-high speed until fluffy, about 3 minutes.
5.       With the mixer at medium-low speed, gradually beat in the egg mixture until fully incorporated.
6.       Add the flour mixture in 3 batches, beating at low speed between additions until just incorporated. Continue to beat for 30 seconds longer.
7.       Spread one-third of the batter in the prepared pan, then spread half of the Nutella on top. Repeat with another third of the batter and the remaining Nutella. Top with the remaining batter. Lightly swirl the Nutella into the batter with a butter knife. Do not overmix.
8.       Bake the cake for about 1 hour and 15 minutes, until a toothpick inserted in the center comes out clean.
9.       Let the cake cool in the pan for 15 minutes. Invert the cake onto a wire rack, turn it right side up and let cool completely, about 2 hours. Cut the cake into slices and serve.


19 August 2014

Milk and Cookies Cupcakes

BY Unknown IN , , No comments

The final lap to Kochu's birthday celebrations was making some cupcakes to take into daycare for Kochu to share with his friends. I tossed and turned about making him another cake but this was just a day after the whole Spider-man cake saga and to tell you the truth, I was all caked out! I couldn't bring my self to bake and decorate another whole cake and so in the end I decided to go with cupcakes. 
You just can't go wrong with cupcakes. Kids love them! 
Milk and cookies are one of those things that makes everything better. It’s also a perfect snack. But this time, milk and cookies came in cupcakes version. These Milk and cookies cupcakes have very good texture , dotted with mini chocolate chips.
The frosting is very milky and creamy and isn’t too sweet. This combo of this frosting and chocolate chips cupcakes, really does taste like milk and cookies.  Decorated with mini  chocolate chip cookies and extra chocolate chips, these are really great treat.  I made the mini cookies as well from scratch, but they’re really just for garnish and you can skip them if you like. Except that they’re delicious, so please make them.

Have a go and tell me you and your kids didn't love it! :)


Milk & Cookies Cupcakes
Slightly adapted from Lemon Sugar and Raspberri Cupcakes
Yield:  24 cupcakes

Vanilla Cupcake 
Ingredients:
  • 2 cups sugar
  • 4 eggs
  • 2 and 1/2 cups all-purpose flour
  • 1 cup milk
  • 3/4 cup vegetable oil
  • 2 and 1/4 teaspoons baking powder
  • 1 teaspoon vanilla 
  • 6 oz mini chocolate chips, plus more for garnish
  • 2 Tablespoons all-purpose flour (to coat chips)
Method:
Preheat oven to 325 degrees F. Beat together eggs and sugar until slightly thickened, about 1 minute. Add flour, milk, oil, baking powder and vanilla and beat for another minute. Pour  mini chocolate chips into a small bowl.  Sprinkle 2 Tablespoons of flour over chips, and mix to coat.  Fold coated chips into batter.Pour batter into lined cupcake tins, filling each tin 2/3 full. Bake for 18-20 minutes (or use a cake-tester).  Remove from cupcake tin right away, and allow to cool on a wire rack.


Mini Chocolate Chip Cookies
Yield:  36-48 mini cookies

Ingredients:
  • 1/2 cup unsalted butter, softened
  • 1/4 cup granulated (white) sugar
  • 1/2 cup packed brown sugar
  • 1 and 1/4 cup all-purpose flour
  • 1/2 teaspoon baking soda
  • 1/2 teaspoon salt
  • 1 teaspoon vanilla
  • 1 large egg, room temperature
  • 6 oz mini chocolate chips
Method:
Preheat oven to 375 degrees.  Line a large baking sheet with a silpat mat or parchment paper, and set aside.

Beat together butter and both sugars until creamy and fluffy.  Meanwhile, combine flour, salt and baking soda in a small bowl.  Add egg and vanilla to butter mixture, and beat until just combined.  Slowly add the flour mixture and beat until just combined.  Fold in chocolate chips.

Spoon a very small spoonful (about the size of a large marble) on to the cookie sheet.  Bake for 4-5 minutes or until the edges are just beginning to turn brown.  Remove from oven and allow to sit on the cookie sheet for another 1-2 minutes.  Transfer cookies to a wire rack, and repeat.

If your kitchen is warm, it would be a good idea to keep the batter in the fridge between batches.  Otherwise, they will spread too much.

Allow cookies to cool completely before garnishing.


Milk Frosting 
Ingredients:
  • 3 sticks (1 and 1/2 cups) unsalted butter, cool room temperature
  • 3 and 1/2 cups confectioners/powdered sugar
  • 7 oz sweetened condensed milk
  • 2 Tablespoons heavy cream
  • 1 teaspoon vanilla extract
  • Amerigel Brown color (optional)
Method:
In the bowl of a stand mixer using the paddle attachment, beat the butter until smooth and creamy.  Add the powdered sugar, and beat to combine.  Add condensed milk, cream and vanilla extract, then beat until light and fluffy, about 5 minutes.

If you want to get the double color toned frosting like mine:
Divide the frosting into two bowls. Add a couple of drops of the brown gel color to one bowl. Mix well to incorporate the color. Keep the other half of the frosting white.
Fill a piping bag with both colors, brown on one side and white on the other.Firmly squeeze the bag until you’re getting equal parts of each icing from the tip.

Generously frost cooled cupcakes.